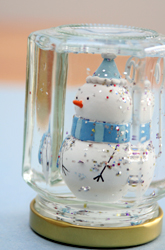
 A snow globes are universally loved by the young and the young at heart around the country.
Especially during the holidays, many love the appeal of the snow globe. We have a DIY tutorial for your very own snowglobe you can make with your kids.
These snow globes will be a family favorite this holiday season.
Supplies
- Small glass jar with tight fitting lid
- Hot glue gun or super glue
- Distilled water
- Liquid glycerin or light corn syrup
- Fake snow or glitter from a craft store
- Small plastic trees, animals, houses, or other seasonal decorations
What to do
- Use the superglue or hot glue to glue your trees or other decorative items to the inside of the lid. Let dry.
- Fill jar about 3/4 full of water or about 1/2 if using corn syrup.
- Add a few pinches of glitter/fake snow in the jar.
- Tightly screw on the lid.
- Turn your jar upside-down and watch the snow fall inside your snow globe.
- Now add several drops of liquid glycerin (or an equal amount of corn syrup) making sure you leave room for air at the top. Repeat step 5.
- Decorate the lid of your snow globe with ribbon, fabric, or pretty paper.
The science behind the snow globe!
The 'snow' in our snow globe will fall according to the amount of glycerin or corn syrup you put into your jar. Water is less dense than the glycerin and corn syrup - the less water and the more of the other liquids, the slower the snow fall will be in your snow globe. We love the lingering, slower kind. How about you?